All weather smoker
Posted: Fri Dec 29, 2017 6:10 pm
My first true smoker was a Brinkman offset grill and it taught me a lot about low and slow cooking. Things like how to control a 1000+F fire from overheating a 12 hour brisket  . After a few years of using sticks I upgraded my offset with a pellet feeder. This greatly increased the repeatability of my cooks, but I was limited to only one brisket or 3 racks of ribs at a time, and the ash from the pellet smoker was getting onto the meat. I needed a design that would:
-work well in any Great White North weather from -10F to 100F (Christmas to July 4th)
-hold enough food for up to 50 people in one cook (word gets out fast when you are smoking meat)
-simple to operate and clean (I'm lazy)
-function is more important than form (after all I'm an engineer not a professional welder)
-easy to move around the house or into the garage for storage
-minimize the ash from the pellet burner getting on the meat
-reliable heat control that can be run unsupervised for hours at a time
So I started a swear jar with the secret purpose of saving up for the materials to make a proper smoker that would last at least a generation. It took a lot of floral language to fill up the jar, but by the end of the summer I had enough to buy the steel.
I stole the idea for the smoker from someone on the internet which sadly I can't find on google anymore. The basic idea is to have a double walled construction where the skins are supported by a 1" square steel frame. The dimensions were also simple: 24 inches wide, 24 inches deep and 36 inches high on all outside dimensions. The inside skins would be 14G mild steel and the outside 16G. Insulation would be rock wool which is good up to 2000F and is available in 1 inch thick panels. Heat and smoke goes in through a hole in the bottom, baffled by stainless sheets and a large water tray so that the smoke travels up evenly on all four sides. Three or four racks seemed to be enough cooking area. All the steel was $400.

I drew the design up in SketchUp to make a bill of materials and placed the order for the steel with a local company who would cut everything to length.
Some pictures from the build:
The completed frame with locking casters on the bottom. I built a jig on a large piece of 3/4 inch plywood to hold all the bars straight for welding.
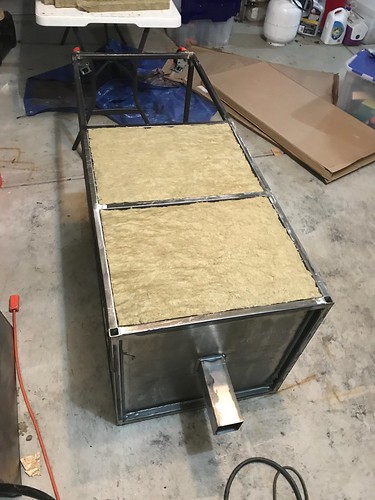
The inner box mostly installed. The box was internally fully welded and sealed. The gaps to the frame were sealed outside the inner box using high temperature silicone for commercial cooking equipment. Insulation won't work properly if there is a path for air to leak through.
The insulation going in. Roxul 1-inch panels from Grainger.
The racks are 9G expanded and flattened steel resting on 3/4 inch angle runners along the sides.
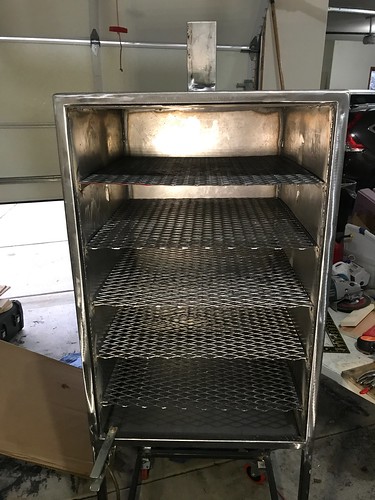
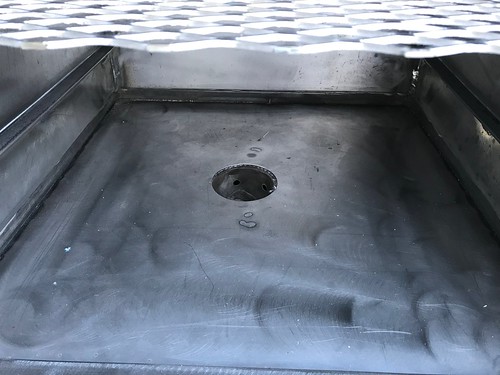
The hole was cut to match the diameter of the burn cup in the pellet smoker (from SmokeDaddy) and sealed with a loop of carbon/fiberglass rope for wood stoves. I welded two 5/6 threaded rod studs under the smoker to straddle the pellet smoker's feed tube and pull it up tight against the smoker and compress the seal. On the bottom rack I set a stainless steel sheet that 1.5 inches from each side to direct the smoke out to the walls. On top of this sheet I set a deep water tray. There are four racks above this and I usually use one of them for the drip tray and the rest for meat.
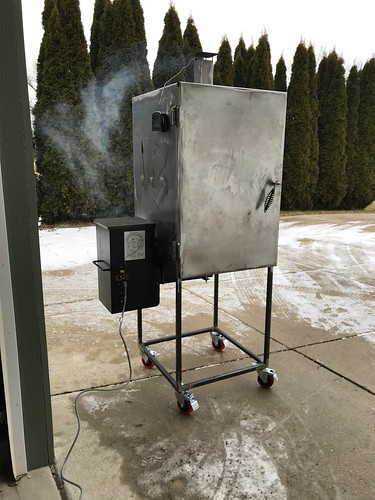
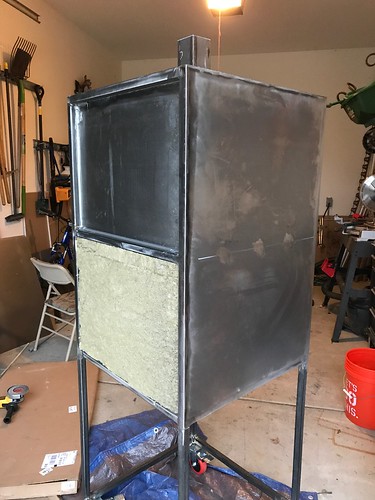
Completed, but not painted. This spring I'll sand it all down and paint the outside with BBQ black.
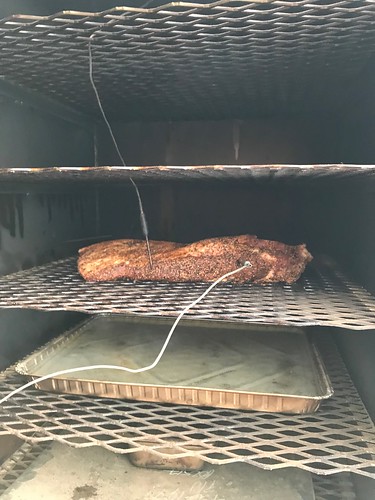
The first brisket turned out excellent according to the wife. It's so easy to use it feels like cheating. The insulation works much better than I anticipated--the only place it feels hot is where the 1" frame comes through. Nowhere on the outside is it too hot to touch.
Of course there is a lot more I can say about this build, especially how I learned to MIG weld with this project (the hard way) . I am proud to say that I used more spools of welding wire than grinding disks, but it was pretty close to even. The door wasn't quite perfectly flat after welding or after a little correction with the front tire of my truck. In the end I had to build up one corner about a 1/16 of an inch to get a full, tight seal.
This project helped me reconnect with my Texas roots. Now if I could only find some way to get Karnes City Polish sausage up here....
-work well in any Great White North weather from -10F to 100F (Christmas to July 4th)
-hold enough food for up to 50 people in one cook (word gets out fast when you are smoking meat)
-simple to operate and clean (I'm lazy)
-function is more important than form (after all I'm an engineer not a professional welder)
-easy to move around the house or into the garage for storage
-minimize the ash from the pellet burner getting on the meat
-reliable heat control that can be run unsupervised for hours at a time
So I started a swear jar with the secret purpose of saving up for the materials to make a proper smoker that would last at least a generation. It took a lot of floral language to fill up the jar, but by the end of the summer I had enough to buy the steel.
I stole the idea for the smoker from someone on the internet which sadly I can't find on google anymore. The basic idea is to have a double walled construction where the skins are supported by a 1" square steel frame. The dimensions were also simple: 24 inches wide, 24 inches deep and 36 inches high on all outside dimensions. The inside skins would be 14G mild steel and the outside 16G. Insulation would be rock wool which is good up to 2000F and is available in 1 inch thick panels. Heat and smoke goes in through a hole in the bottom, baffled by stainless sheets and a large water tray so that the smoke travels up evenly on all four sides. Three or four racks seemed to be enough cooking area. All the steel was $400.
I drew the design up in SketchUp to make a bill of materials and placed the order for the steel with a local company who would cut everything to length.
Some pictures from the build:
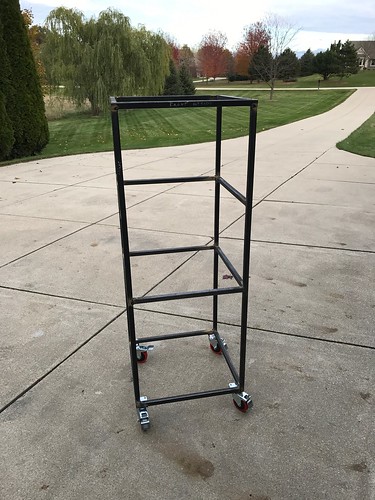
The completed frame with locking casters on the bottom. I built a jig on a large piece of 3/4 inch plywood to hold all the bars straight for welding.
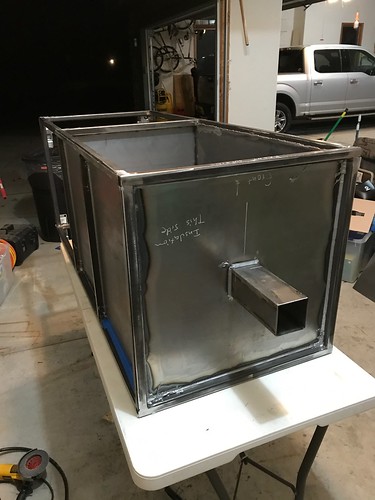
The inner box mostly installed. The box was internally fully welded and sealed. The gaps to the frame were sealed outside the inner box using high temperature silicone for commercial cooking equipment. Insulation won't work properly if there is a path for air to leak through.
The insulation going in. Roxul 1-inch panels from Grainger.
The racks are 9G expanded and flattened steel resting on 3/4 inch angle runners along the sides.
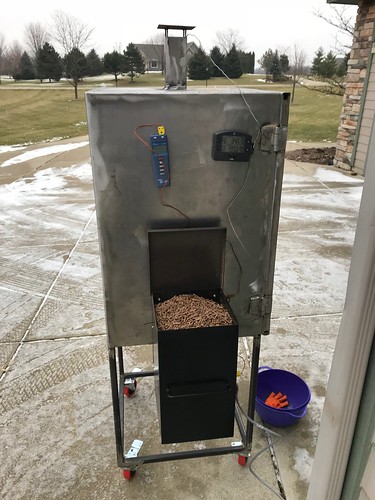
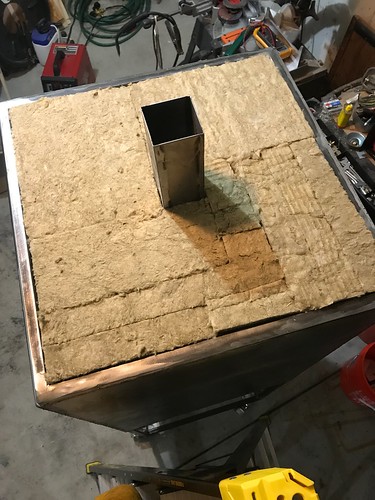
The hole was cut to match the diameter of the burn cup in the pellet smoker (from SmokeDaddy) and sealed with a loop of carbon/fiberglass rope for wood stoves. I welded two 5/6 threaded rod studs under the smoker to straddle the pellet smoker's feed tube and pull it up tight against the smoker and compress the seal. On the bottom rack I set a stainless steel sheet that 1.5 inches from each side to direct the smoke out to the walls. On top of this sheet I set a deep water tray. There are four racks above this and I usually use one of them for the drip tray and the rest for meat.
Completed, but not painted. This spring I'll sand it all down and paint the outside with BBQ black.
The first brisket turned out excellent according to the wife. It's so easy to use it feels like cheating. The insulation works much better than I anticipated--the only place it feels hot is where the 1" frame comes through. Nowhere on the outside is it too hot to touch.
Of course there is a lot more I can say about this build, especially how I learned to MIG weld with this project (the hard way)
This project helped me reconnect with my Texas roots. Now if I could only find some way to get Karnes City Polish sausage up here....