Page 2 of 2
Re: Stump's Clone 2.0
Posted: Thu May 26, 2011 12:04 pm
by MWells
You've got your flow direction backwards. The large (8 in diameter) tube is the coal chute. It holds the unlit coal. That feeds into the firebox (the 8 in square box). There is a grate in bottom of that box. The smaller tube that runs into the cook chamber transfers the heat from the firebox to the cook chamber. There will be an exhaust in the top of the cook chamber, which I have not installed yet. There will also be an air inlet that comes into the side that will feed oxygen to the fire. The top of the chute will have a door that is sealed, as well as the cook chamber door and the door to the ashbox. That way air can only come in through the inlet, up through the fire, through the transfer tube, then out the exhaust. As the coal burns up, it is fed from the top by the unlit coal. On my last cooker, which had a bigger cook chamber, I got just over an hour per pound of fuel. I put a couple chunks of wood in the ashbox that will ignite as small pieces of burning coal falls down on it. This provides the smoke.
It is a little tough to get your head around, until you see it in action. With the chute loaded and pit up to temp, I should get about 16 hours or so of burn time. Sure makes for some great overnight cooks.
Re: Stump's Clone 2.0
Posted: Thu May 26, 2011 12:07 pm
by MWells
TX Cajun - I just noticed you are in Killeen. When I get it up and going, you are welcome to come by and check it out. I'm in Nolanville.
Re: Stump's Clone 2.0
Posted: Tue Jun 07, 2011 7:11 pm
by MWells
I got to work two straight days. I had two days off before summer school starts. Made some nice progress.
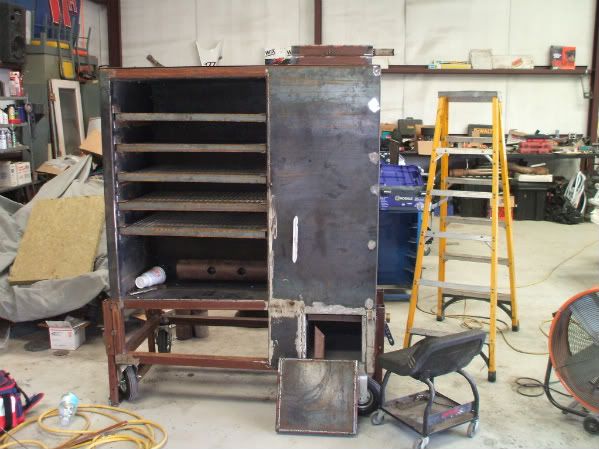
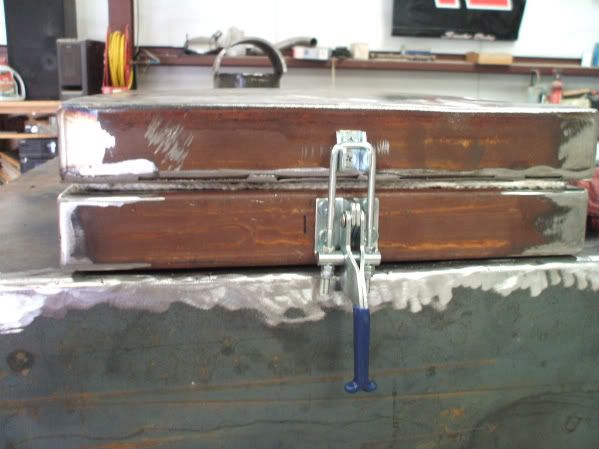
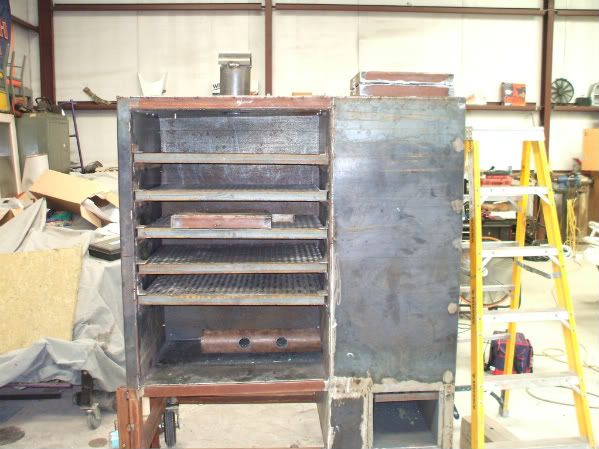
Here is how it sits after today, racks installed and door for the ash box ready to hang. And yes, before anyone says anything the bottom rack is sloped. I now know that am 8th bubble will equal about a half inch fall over 3 feet. Since the floor is sloped, I had to use a level on the rack to get it straight. I was mounting the runners by myself, and I guess I got off a little. Its not too bad though. I don't think my sausages will roll off the rack.
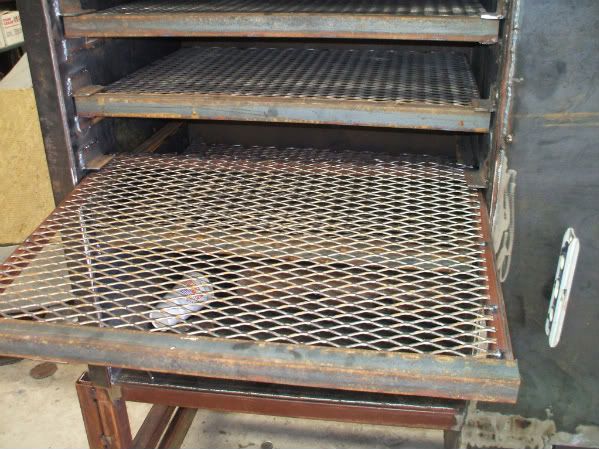
Here's a close up of the racks, with anti-tippers. I capped the front with angle iron. Not really necessary, but I think it makes them look nicer when they are slid all the way in.
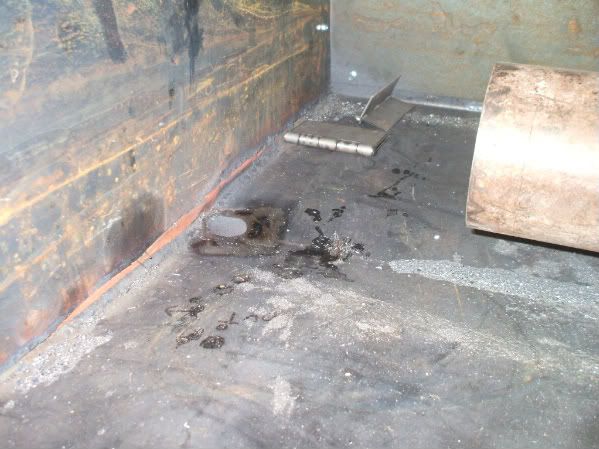
Here is the drain. Went in nicely, Should work fine.
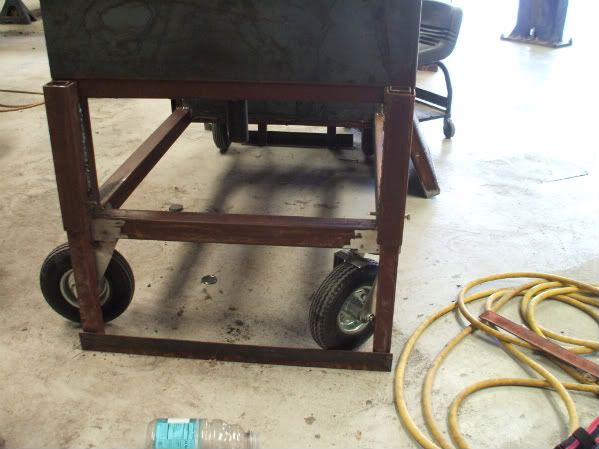
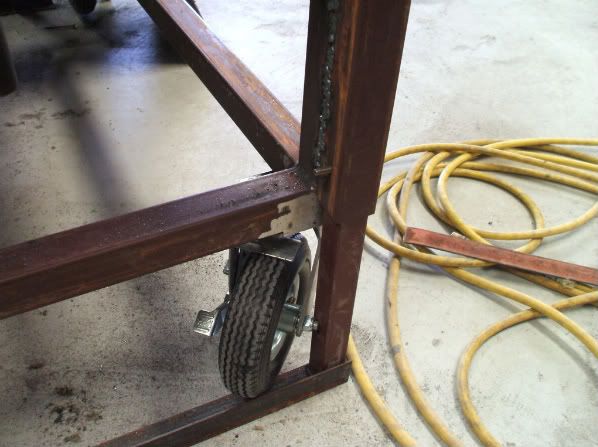
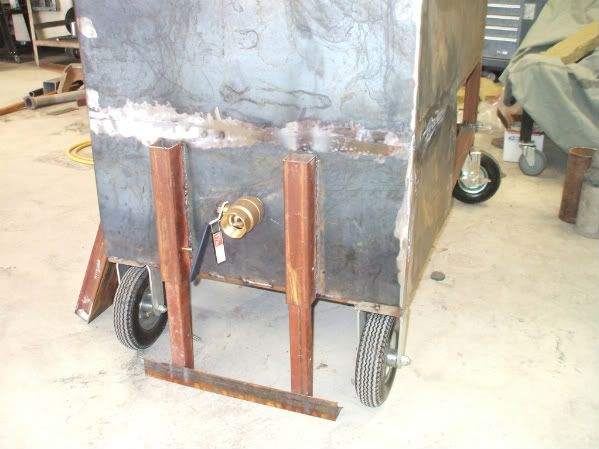
These next couple pics show the drop down legs we installed. The wheels just wont make it long, so we built these so that we can pull up the legs to roll it around, then drop them back down to provide support. They work pretty well and are very stable.
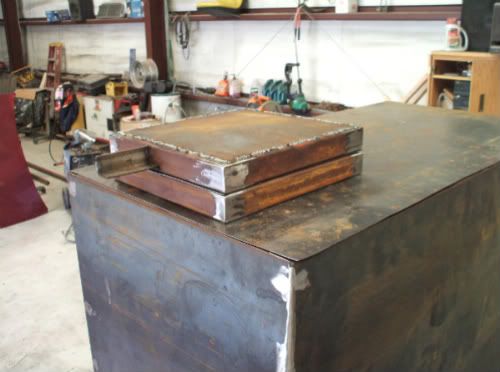
The chute door. That piece of angle is my ground point so that I could weld the skins on. They aren't mounted yet, just posing for the pic.
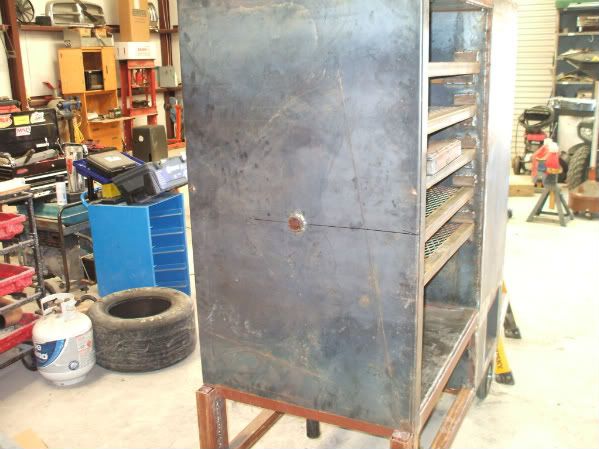
This is the firebox end. I brought the valve out the side. I think it will provide the Stoker fan some protection since it isn't in the ashbox door. You can also see the other drop down legs.
Still have to build the cook chamber door, mount the exhaust and weld on the top. May get to work some Friday.
Stump's Clone 2.0
Posted: Tue Jun 07, 2011 8:36 pm
by atcNick
Nice! An I wish I knew how to weld
-Nick via Tapatalk
Re: Stump's Clone 2.0
Posted: Wed Jun 08, 2011 7:34 am
by MWells
My welding experience eis limited to the two cookers. We did do a deer stand this fall too. It's really not that hard to get two pieces of metal to stick together. Making nice clean pretty welds is what is tough. Sometimes I get it right, but most of the time it looks like a big hairy caterpillar. It is really alot of fun though to come up with something in your mind and then make it come to life. I like working metal way better that working with wood. Metal is much more forgiving.
Re: Stump's Clone 2.0
Posted: Sun Jun 12, 2011 7:47 pm
by MWells
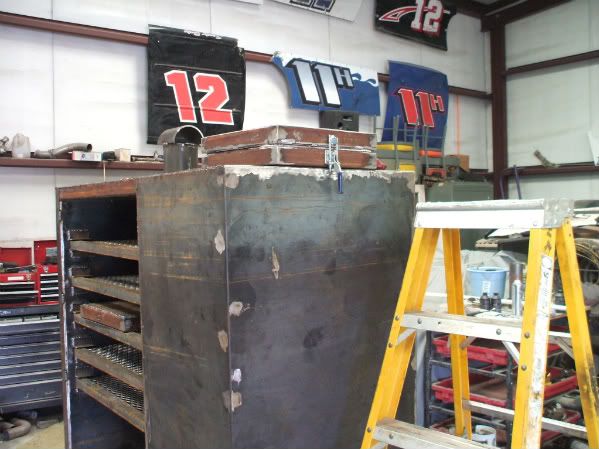
New pics after working today. It seems like it is crawling along, but alot of the things we are doing now are very detailed. We did get the top welded on too. We full welded the seams to make it water tight. I have a tone of grinding to do though. Makes for a nice edge though.
Here is the chut door welded on. I used RTV to seal around the frame and the chute. We were tired of welding.
Chute door latch. I like the bigger ones much better.
Side shot of the chute door.
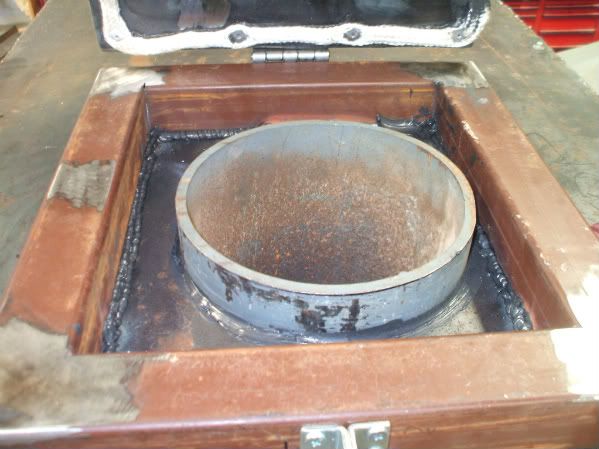
Here's a twist. I put in a tube to feed my temp probes through. If it lets put too much smoke or heat, we can weld it up. I think it will be much better than running them through the door.
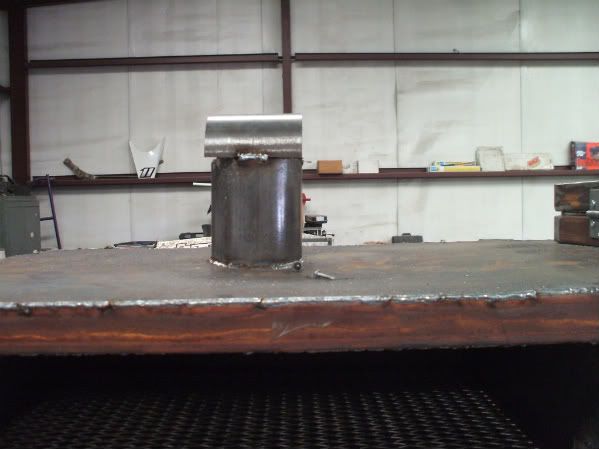
Exhaust stack. We put a bird house on it. I will do some shaping and smoothing before it gets paint.
Shot of the front. Next gotta hang the ash box door and build the cook chamber door.
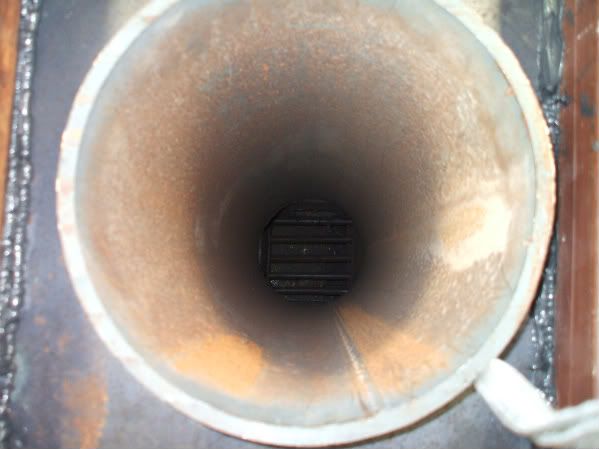
And a shot down the mouth of the beast. It's begging for some fuel.
Hopefully we will have the doors hung and can run a test fire next time. Not sure when that will be though with Father's Day coming up. Gonna spend some time with the kids.
Re: Stump's Clone 2.0
Posted: Mon Jun 13, 2011 9:26 am
by BigTex33
slick looking set up. Thats a fun feeling to watch a creating take shape from your own to hands. Good luck with the rest of it.
Re: Stump's Clone 2.0
Posted: Mon Jun 13, 2011 10:39 am
by dheidemann
what are you going to use in it? lump? and how much does it hold?
Re: Stump's Clone 2.0
Posted: Mon Jun 13, 2011 1:38 pm
by MWells
I usually use lump, but I stocked up on Kingsford blue during the Home Depot sale. I have 160 lbs just waiting for a match. After that I will probably go back to lump.
I have no idea how much it will hold. I am guessing right around 20 lbs of briquettes. Maybe just a little less lump. Should be enough for 18 hours of burn. Hopefully we will find out soon.
Re: Stump's Clone 2.0
Posted: Sat Jun 18, 2011 10:24 am
by dheidemann
how would you light it? weed burner?
Re: Stump's Clone 2.0
Posted: Sat Sep 03, 2011 4:17 pm
by dheidemann
any word on how it works?
Re: Stump's Clone 2.0
Posted: Mon Sep 05, 2011 7:11 pm
by DJ
Super Build, appeciate all the detail you have provided!! Hope to see a few more pics in action, Soon!!
dj
Re: Stump's Clone 2.0
Posted: Tue Oct 18, 2011 7:27 pm
by shorty69
looks good! and since your last post in june... what's the update?
Re: Stump's Clone 2.0
Posted: Wed Apr 18, 2018 10:24 pm
by RadRantz
MWells wrote:There is another forum that is full of guys that have done these builds. Not sure how the mods feel about giving links to other sites, so if you want it pm me.
They dont have plans specifically, but it is pretty easy to design once you have the general idea of what is needed. The last one I built would cook a little over an hour per pound of fuel. And once I got it set it wouldn't wander more than a few degrees. I later got a BBQ guru, and that thing would keep it locked right where I wanted it.
MWells,
I know this post is a touch old but I am giving this a shot anyway. I have been searching for information to start a GF build for some time now. Could you send me some links if you still have them at your disposal? I tried to send you a PM but was unable to do so.
Thank you!